最近一直在用VScode做Django项目开发练习,一个快速好用的开发环境是必备品。VSCode 的确是一个好东西,内部不仅集成了git,还集成了Docker,这让我们可以在本机(windown 10)上直接启动一个Docker 镜像做为开发环境。而且这个Docker镜像本来也就是一个Dockerfile加一些配置文件生成的。这让我们生成了一个概念,线上运行的程序是代码,而运行程序的Docker环境也是代码,甚至运行docker环境的公有云资源也可以用代码申请生成,统统进入代码库管理。凡人皆有一死,一切皆是代码 :)。
下载安装 Docker for windows
以前在windows上用docker 先要安装一个Oracle VirtualBox,然后再在VM中启Docker.现在不用了,如果你用的是windown10 Pro,那么直接安装就可以,一个安装程序搞定。
- docker for windows 下载地址
我选择了Stable channel 版本 - 安装前须知
1、之前的Oracle VirtualBox 将不可用
2、要在BIOS中开户中虚拟化支持
3、这个Docker 只支持在 64bit Windows 10 Pro, Enterprise and Education 系统上运行
4、在虚拟机上跑的win10 Pro也可以运行docker ,但不保证。 - 安装Docker for windows
和平时安装其它windows程序一样,按图一路安装下去就可以了,会要重启系统生效。在安装完成重启后,就会在右侧任务栏出现一个鲸鱼图标。 - 配置Docker for windows setting
主要就两个:
1、配置共享盘,我共享的是C:盘,下面还给了个挂载共享盘的一个目录到docker容器的一个例子,如下图:

2、配置用多少个CPU和多大内存,如下图:
运行Docker,并用命令行生成相关的Docker images,然后运行Container
下载 django-uwsgi-nginx-mxonline
注: 这个是我根据django-uwsgi-nginx 改的一个dockerfile,里面安装了所有慕学online项目要用的软件,用docker build好就可以用
源dockerfile的链接点这里1
git clone https://github.com/w8833531/django-uwsgi-nginx-mxonline-mxonline
用docker build 一个image
1
2
3
4
# 你可以安自己的需要,修改 django-uwsgi-nginx-mxonline-mxonline中的Dockerfile及nginx-app.conf uwsgi.ini等文件
cd django-uwsgi-nginx-mxonline-mxonline
# 我用docker build了一个mxonline的image
docker build -t mxonline .运行一个以webapp为image的Container
1
2
3
4
5
# -v c:/git/MxOnline:/home/docker/code/app, 把本机的c:\git\MxOnline目录挂载到Container的 /home/docker/code/app 这样就可以一边更改本机上的代码,一边看运行结果了
# -p 80:80 对外export 80端口
# -e LANG=C.UTF-8 解决中文问题 (docker file 中可以用ENV指定)
# -e TZ=Asia/Shanghai 解决时区问题 (docker file 中可以用ENV指定)
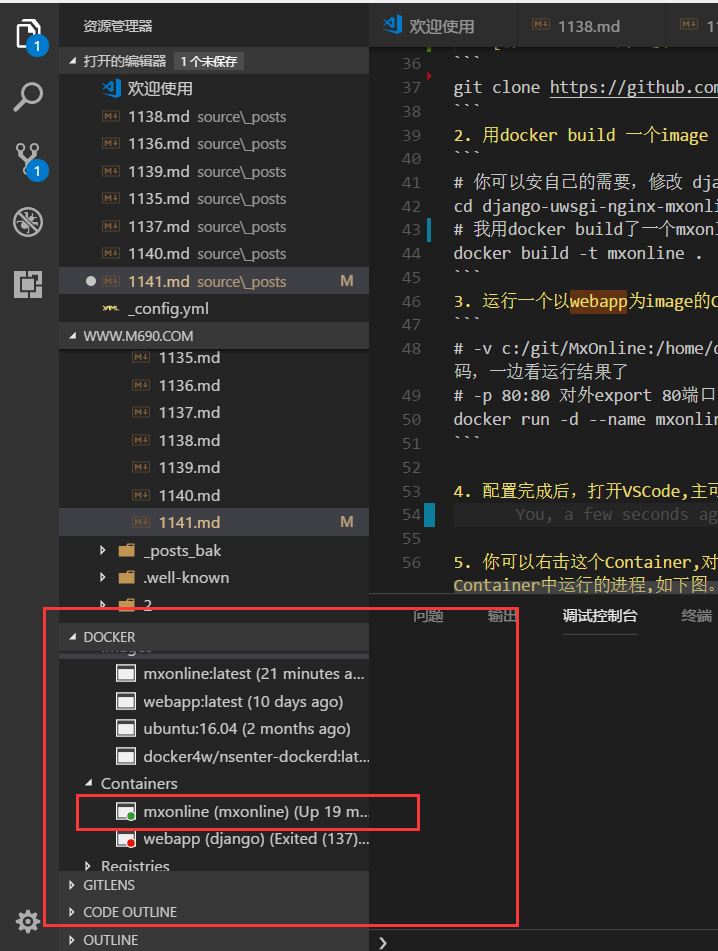
docker run -d --name mxonline -e LANG=C.UTF-8 -e TZ=Asia/Shanghai -v C:\git\MxOnline:/home/docker/code/app -p 80:80 mxonline配置完成后,打开VSCode,主可以在左则的Docker选项卡中,images和Containers可用了,如下图

你可以右击这个Container,对这个Container进行重启、停止、删除、查看日志、获取shell操作,很方便。我们可以右击获取一个shell,然后用ps -efww 查看Container中运行的进程,如下图。

配置 django-uwsgi-nginx
配置supervisor,默认会启动nginx 和 uwsgi两个进程
1
2
3
4
5
6
7
8
# /etc/supervisor/conf.d/supervisor-app.conf
[program:app-uwsgi]
#如果你安装了新的uwsgi,可以更新这个command的路径
#command = /usr/local/bin/uwsgi --ini /home/docker/code/uwsgi.ini
command = /usr/local/bin/uwsgi --ini /home/docker/code/uwsgi.ini
[program:nginx-app]
command = /usr/sbin/nginx配置nginx,可以更改 upstream的server配置, 也可以更改/static 和 /media指向的目录路径
1
2
3
4
5
6
7
8
9
10
11
12
13
14
15
16
17
18
19
20
21
22
23
24
25
26
27
28
29
30
31
32
33
34
35
36
37
38
39
40
41
# 配置文件路径/etc/nginx/sites-enabled/default
# nginx-app.conf
# the upstream component nginx needs to connect to
upstream django {
server unix:/home/docker/code/app.sock; # for a file socket
# server 127.0.0.1:8001; # for a web port socket (we'll use this first)
}
# configuration of the server
server {
# the port your site will be served on, default_server indicates that this server block
# is the block to use if no blocks match the server_name
listen 80 default_server;
# the domain name it will serve for
server_name .example.com; # substitute your machine's IP address or FQDN
charset utf-8;
# max upload size
client_max_body_size 75M; # adjust to taste
# Django media
location /media {
alias /home/docker/code/app/static/media; # your Django project's media files - amend as required
}
# Django static
location /static {
alias /home/docker/code/app/static; # your Django project's static files - amend as required
}
# /static/xadmin static dir for xadmin
location /static/xadmin {
alias /home/docker/code/app/extra_apps/xadmin/static/xadmin; # your Django project's static files - amend as required
}
# Finally, send all non-media requests to the Django server.
location / {
uwsgi_pass django;
include /home/docker/code/uwsgi_params; # the uwsgi_params file you installed
}
}配置 uwsgi,可以更改processes 进程数,chdir目录,module 中的module名等配置
1
2
3
4
5
6
7
8
9
10
11
12
13
14
15
16
17
18
19
20
21
22
23
24
25
26
27
28
29
30
31
32
33
[uwsgi]
# this config will be loaded if nothing specific is specified
# load base config from below
ini = :base
# %d is the dir this configuration file is in
socket = %dapp.sock
master = true
processes = 4
[dev]
ini = :base
# socket (uwsgi) is not the same as http, nor http-socket
socket = :8001
[local]
ini = :base
http = :8000
# set the virtual env to use
#home=/Users/you/envs/env
[base]
# chdir to the folder of this config file, plus app/website
#chdir = %dapp/
chdir = %dapp
# load the module from wsgi.py, it is a python path from
# the directory above.
#module=MxOnline.wsgi:application
module=MxOnline.wsgi
# allow anyone to connect to the socket. This is very permissive
chmod-socket=666配置更新完成后,就可以通过下面的命令重启nginx及uwsgi程序了
1
2
3
4
5
6
7
8
9
10
###查看supervisor 启动的应用状态
#supervisorctl status
app-uwsgi RUNNING pid 7, uptime 3:53:55
nginx-app RUNNING pid 8, uptime 3:53:55
### 重启应用
#supervisorctl restart all
nginx-app: stopped
app-uwsgi: stopped
app-uwsgi: started
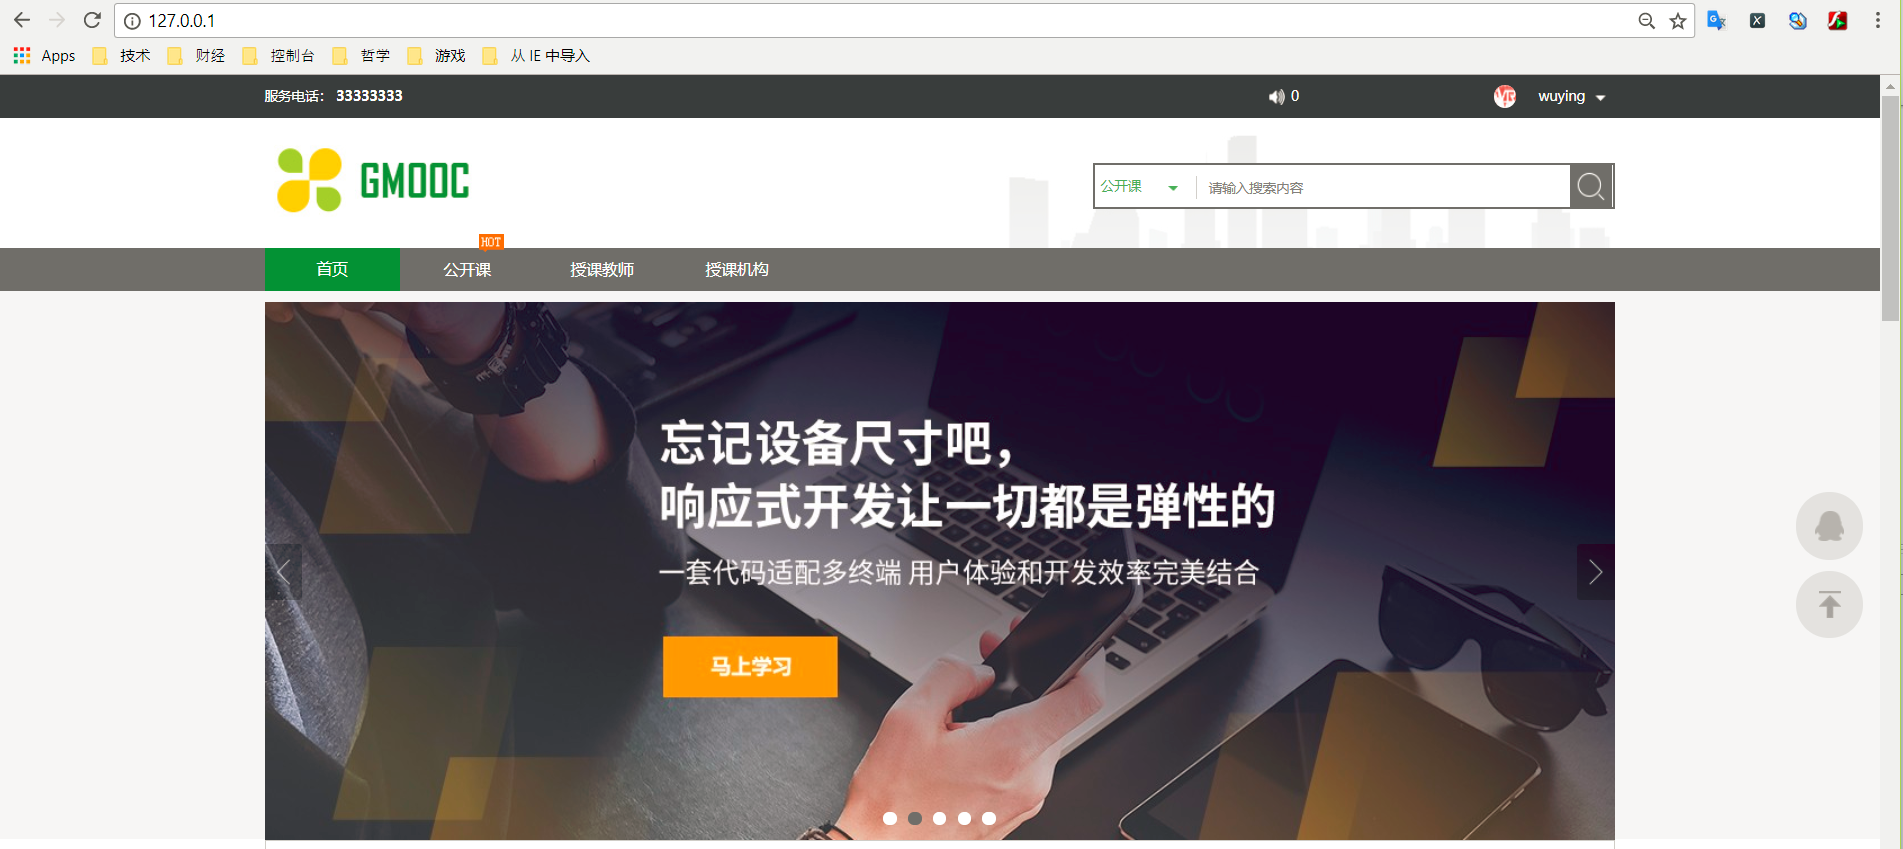
nginx-app: started用chrome访问本机 http://127.0.0.1 ,看是否访问正常,如下图:

常见问题解答
- 如何从Container访问实体机(本机)上的mysql
我没有单独运行一个容器来跑mysql,然后做link。 因为本机上已经有mysql在跑了。如何从win10的容器来访问本机的mysql呢?建议使用本机的vEthernet (Default Switch)的 IP,如这个IP是172.27.240.209,那么django项目的setting.py中的mysql的HOST设置就应该是如下(记得在mysql中设置172.27.240.209的root访问权限 :):1
2
3
4
5
6
7
8
9DATABASES = {
'default': {
'ENGINE': 'django.db.backends.mysql',
'NAME': 'mxonline',
'USER': 'root',
'PASSWORD': 'rootpasswd',
'HOST': '172.27.240.209',
}
}
2、 为什么container中共享盘突然不能用了?
有一次,发现共享盘突然不能用了,所有用-v 命令挂的目录里的内容都没有了,全为空。研究了半天,发现是因为自己更改了本机(Win10 Pro)的admin用户的密码,所以docker 的共享盘就失效了,而且没有任何提示。解决方法是在docker 的setting中,重新再设置一下共享盘,并重新apply一下,这时,就会提示你输入新的密码了。输入新密码,问题解决。
3、 为什么Xadmin图片显示不正常
请在nginx中配置静态文件如下设置:1
2
3
4
5
6# 在server中增加如下内容 :
# vi /etc/nginx/sites-enabled/default
# /static/xadmin static dir for xadmin
location /static/xadmin {
alias /home/docker/code/app/extra_apps/xadmin/static/xadmin; # your Django project's static files - amend as required
}
4、 为什么安装了DjangoUeditor还是在xadmin中无法显示
这还是静态文件的问题,请做下面的CP:1
rsync -av /usr/local/lib/python3.6/dist-packages/DjangoUeditor/static/ueditor/ /home/docker/code/app/static/ueditor/
5、 Ueditor中,为什么不能上传中文文件名的图片
只要在运行docker run时,加一个 -e LANG=C.UTF-8 环境变量就可以了。已经更新了我的dockerfile ,可以直接下载build新的docker image,这个问题就可以解决。
相关链接
下面的链接写的是在aliyun的ECS(ubuntu16.04)上实现docker django-uwsig-nginx部署的方法,上面的mysql是一个容器,直接被link到 django-uwsig-nginx的容器上,可以用做参考。访问链接:

